Bandar Changyuan, Wilayah Henan, China
+86 17513230665
Penglihatan kren gantri dengan mudah mengangkat beban berat sangat mengagumkan. But what if you could harness that power in your own workshop or garage? Building a gantry crane is an ambitious yet incredibly rewarding DIY project for serious fabricators and heavy-duty hobbyists. It opens up a world of possibilities, from engine pulls to moving machinery.
While commercial gantry cranes are readily available, building your own offers distinct advantages:
Building a gantry crane is serious business. Safety and structural integrity are paramount. Thorough planning is non-negotiable:
1. Load Capacity: What’s the maximum weight you need to lift? Crucially, build with a significant safety margin (Mis., 2x or 3x your max intended load). Never underestimate weights!
2. Span: Measure the width of the area where the crane will operate. This determines the length of your main beam.
3. Mengangkat ketinggian: How high do you need to lift loads? Consider the height of objects you’ll lift over.
4. Materials: Primarily structural steel:
5. Mobility: Will it be fixed or need to roll? Mobile cranes require a robust base frame and extremely heavy-duty casters rated for the total weight (crane + load).
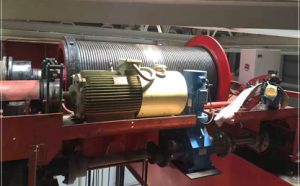
6. Hoist Mechanism: Will you use a chain hoist (manual or electric) or a lever angkat elektrik? Ensure its rated capacity matches your crane’s design. You’ll need a trolley to run it along the beam.
7. Design & Engineering: This is critical. Don’t guess! Use established engineering formulas for beam deflection and column buckling, or base your design closely on proven DIY plans or commercial specifications scaled appropriately. Consult an engineer if unsure, especially for higher capacities (> 1 ton). Software or online beam calculators can help.
1. Detailed Planning & Cutting:
Finalize all dimensions based on your calculations/design.
Carefully measure, mark, and cut all steel components (beam, legs, braces, base members). Precision is key for square assembly.
Prepare gusset plates for critical joints.
2. Assemble the Base Frames (if mobile):
Weld or bolt the base frame sections (usually rectangular) that will hold the legs and casters.
Securely attach the heavy-duty casters. Ensure brakes are functional.
3. Build the Legs:
Assemble each leg (if using multiple sections). Add diagonal bracing within the leg structure if needed for tall cranes.
Securely attach the feet/base plates to the bottom of each leg.
4. Attach Legs to Base:
Position legs vertically and perfectly plumb on the base frame.
Tack weld, check for squareness and plumb from all angles, then fully weld. Reinforce with gusset plates at the leg-to-base joints.
5. Install the Main Beam:
6. Add Cross Bracing:
Cut and fit diagonal braces between the legs, both front-to-back and side-to-side. This prevents the entire structure from collapsing sideways under load or when moving.
Weld securely. This step dramatically increases rigidity.
7. Finishing & Safety:


Building a gantry crane is a significant undertaking, demanding respect for engineering principles, meticulous fabrication, and unwavering commitment to safety. However, the payoff is extraordinary. You gain an incredibly versatile and powerful tool that transforms how you handle heavy objects in your workspace. The satisfaction of lifting a substantial load with a crane you built yourself is unmatched. If you have the skills, space, and respect for the forces involved, embarking on this DIY journey can be a game-changer for your workshop capabilities. Plan thoroughly, build robustly, and lift safely!


Tinggalkan komen anda di sini